
Is there someone special with an initial J. Are you planning for a sweet gift or maybe a birthday party for that special person then these Creative Ideas for J-Shaped Chocolates can be helpful. I know there’s a lot to do so without wasting any time let’s start the discussion.
check out my previous post: 20 Candy That Starts with S: With Pictures
Significance of Letter “J”
First of all, What is the significance of the letter J for you? Think if it’s the initial of someone’s name. Then what is the relation of that person with you? The nature of relationships will greatly determine the look or the true essence of the chocolate your prepare.
If the J letter is there to represent the Initials of Months like January, June, or July. Then anything casual will look great, even simple chocolate molds “J”s will do the task.
Otherwise, you can use a red or bright color combination for lovers or maybe something graphic and vivid for children. It all depends on what you wanna achieve.
The best option for beginners is to keep it simple. Chocolate molding and shaping cakes is an art that takes some time to expertise.
The letter “J” for me is very important. If I have to design J-Shaped chocolate then I would use simple milk chocolate, a little bit of dark chocolate, caramel, violet food coloring, and sugar dust. Soft sweet and chewy chocolate is something that I like the most. What you choose is your personal choice.
What to do with J-Shaped Chocolate
Again the choice of making a J shape Chocolate and its utilization is your personal choice. You can either mold solid chocolate in the shape of the letter “J”. Maybe you can carve out the letters from chocolate blocks or mix-match some other ingredients to prepare a J Shape chocolate.
No matter what you choose, the ultimate outcome is a soft sweet beautiful-looking chocolate. If you ask me about the utilization of this J-shaped chocolate then, Ummm…
- You can use it to denote the initials of someone special. Use your creativity for the decoration and keep the idea of favorites in your mind. It is edible so the taste and texture must be comforting.
- You can also add month initials (like “J” for July) on a birthday or anniversary cake.
- Maybe use it as a Christmas decor or anything funky.
- You can also make a floral pattern by arranging multiple j-shaped chocolates in a closed circle.
The letter J suits in many places and if it’s sweet and delicious then the best place is in your mouth. Choose your own way to use, decorate, and then eat a J-shaped Chocolate. And yes, don’t forget to share it with others.

Some Ideas to make J Shaped Chocolate
You can represent the letter J in many ways. It can be chocolate, a group of candies, or a delicious cake. The creativity is entirely your department although I can suggest a few creative ideas for J-shaped Chocolate.
1. Simple J-Shaped Chocolates
The first option is pretty simple. You have to carve or mold out Letter J from solid Chocolate bars. you can mix some ingredients like raisins, nuts, or chili flakes if you like. Mixing is usually comfortable with molten chocolate.
Ingredients You will need:
- Solid milk and dark chocolate
- J Shaped molds
- Knife and spatula for carving and mixing
- Food coloring
- Cardboard and oil paper (optional for mold making)
- Nuts and Raisins if you like to mixup
Preparation:
- If you wanna carve J out of a solid chocolate bar. Then use a hot knife and gently scrape off extra chocolate other than the desired shape. Keep in mind this technique is not perfect and you have to decorate and resize the chocolate letter J for proper finishing.
- The Next option is chocolate molding. You have to start with a solid soft chocolate bar.
- Prefer mixing milk chocolate with a little bit of dark chocolate for strong color and taste. If you want bright coloring mix a few drops of your favorite food coloring in the batch.
- Heat it, mix it and pour everything with raisins and nuts into the J- Shaped chocolate molds.
- If you don’t have a chocolate letter mold then make one with cardboard or scraps of a milk carton and layer it with oil paper from inside. This method is especially helpful if you want to add custom shapes or edges to the J-shaped chocolate.
- What is the Oldest Candy Still in Production?
2. J-Shaped hard candy or tootsie
The candy molding is similar to the chocolate mold. You just have to add crystal sugar to the molten chocolate mixture. The sugar will add hardness to the candy. It will also give the chocolate candy and shiny glaze.

Required Ingredients:
- Crystal Sugar
- Milk Chocolate
- Food Coloring
- Cand Mold for Letter J
Preparation:
- Mix Crystal sugar with the chocolate bar for melting.
- Melt and mix everything well according to the desired consistency.
- Pour the mixture into the J shape molds and let it cool for 20-30 minutes.
- Then dust the candies with sugar powder for the proper glaze.
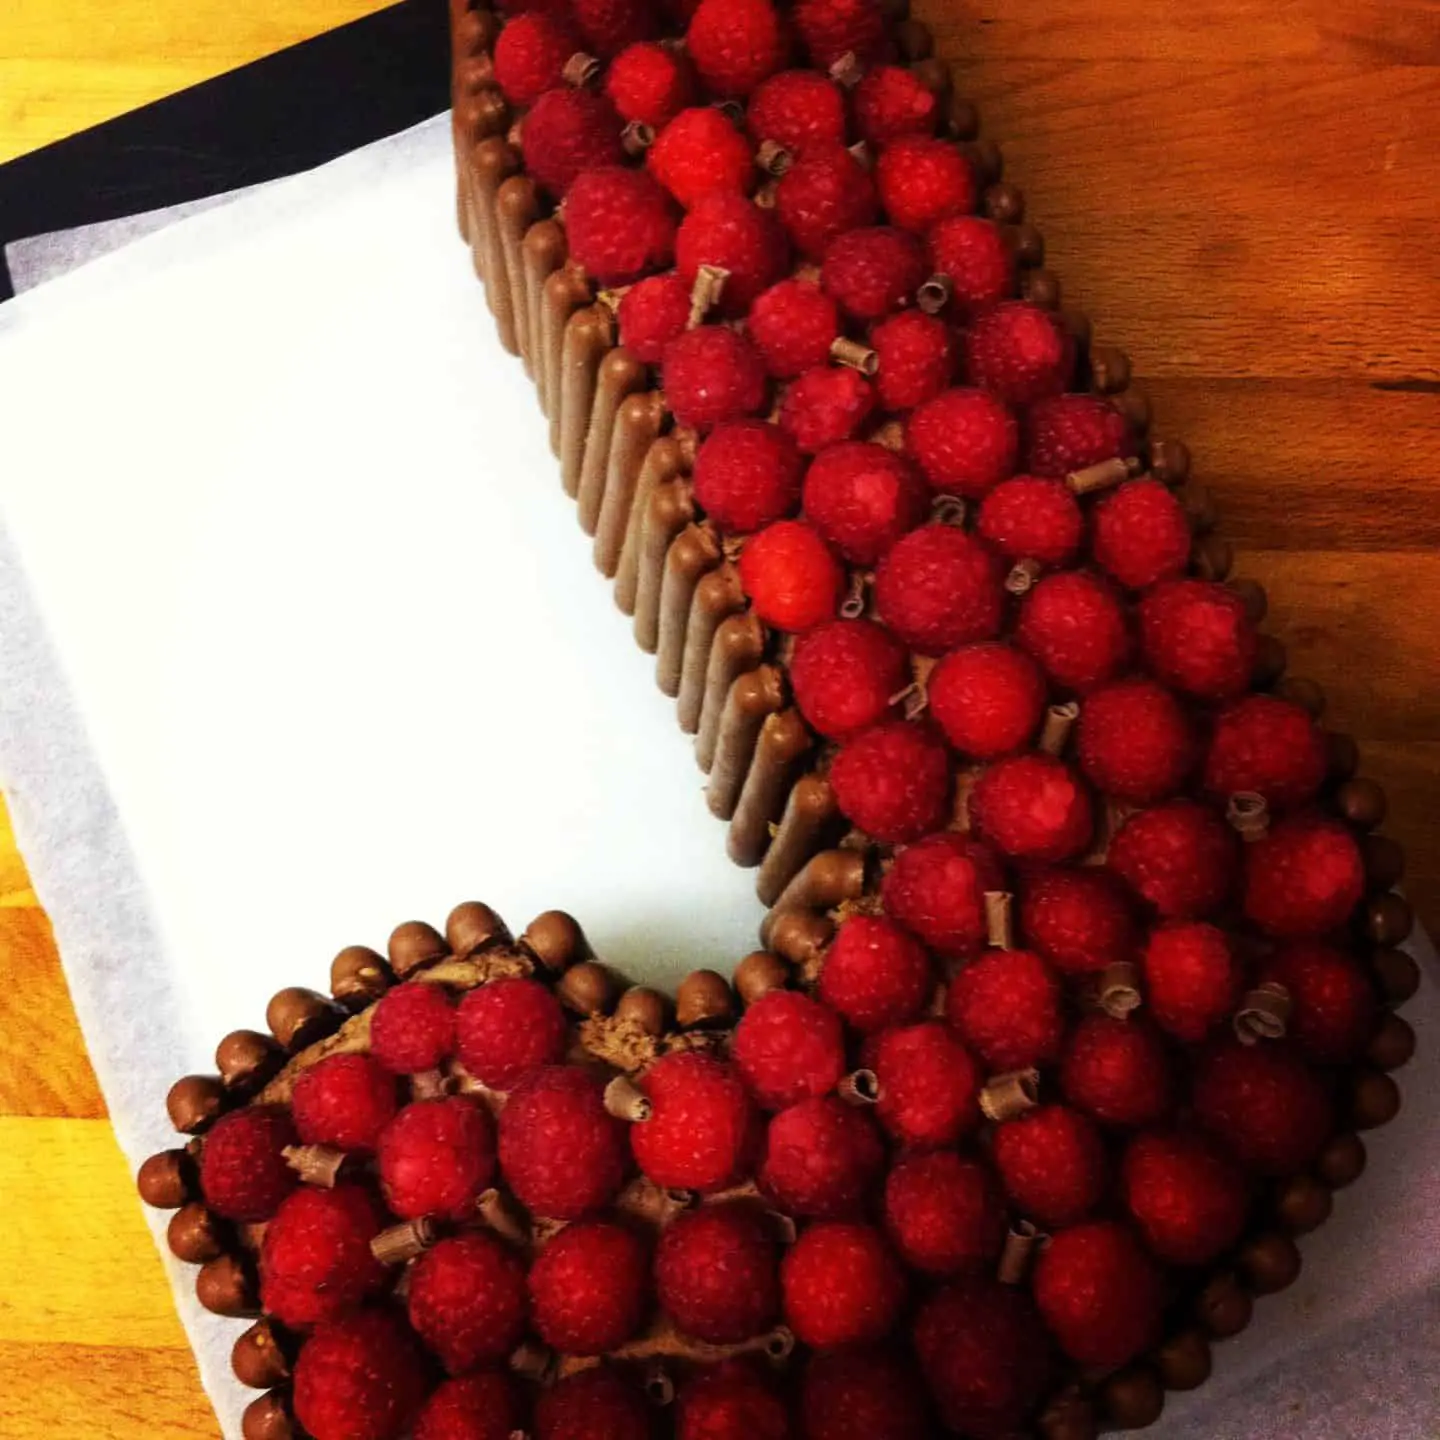
3. J-Shaped Chocolate Cake
A Chocolate cake is probably the best option on this list. And what’s better than a J-shaped chocolate cake. It’s special and very beautiful. Now the color, flavor, and decor are up to you but the shape itself is special. You must make it attractive and delicious especially if it’s for your loved one.
You will need:
- Cake batter mix of your Choice
- A regular rectangular bread mold
- Some nuts and Resins
- chocolate cream, and chocolate flakes
- Food coloring according to the occasion
Preparation:
- Start with preparing the bread mold. Oil it and preheat the mold or container at a low temperature for 5 minutes.
- Half fill the baking container with cake batter. I am not discussing the flavor or consistency of batter at this point as it will be a very long discussion. Prepare the cake batter with your choice of ingredients. If you like it then everyone will love the cake.
- Bake the cake at medium heat for 25-30 minutes and then another 10-15 minutes at low heat. Temperature adjustment is a matter of expertise. It will depend on the consistency of the batter and the quantity as well. So fine-tune it before the final try.
- Prepare at least two similar sizes of rectangular cake bread.
- The next job is to split a bread in vertical half to set the lower ends of the letter “J”. Again mark the length and test your arrangement before final adjustment and cutting.
- Once your bread is in place, it’s time for the icing and decoration. Use molten chocolate and caramel cream on top of fondue layers. You can also use a simple chocolate spread if you wish.
- Give your cake a final touch with cherries, chocolate roses, or some abstract chocolate designs. My suggestion is always to keep it simple and sweet for your loved ones.
- Keep in mind flavor of the J-shaped chocolate cake is as important as its appearance.
4. Multiple candy Arrangement in J Shape
A simple Arrangement of different candy flavors is sometimes the best way to surprise. Instead of molding, shaping, or carving you can simply arrange your favorite chocolate and candies inside a J-shaped box.
You will need cardboard to prepare a J-shaped base container. Again use your creativity for the specifics and decorations. You can use colored paper and maybe some fragrant flowers if you like.
5. J Shaped Chocolate Biscuits and Wafers
Chocolate Biscuits and Wafers are also good for your decorations. Preparing a J-shaped biscuit or wafer is easy and you don’t require any special knowledge for that.
You will need:
- A wafer maker
- Batter mixes like corn starch, wheat flour, or some resins
- Sugar and salt as per requirement
- Baking Mold in J shape or simple baking cloth and oil paper will do the job
- Finally oven, microwave, or a simple stove
Preparation:
If you have ever made gingerbread then this will be an easy task for you.
- Prepare a baking tray for the biscuits. Oil it well and place the molds or shape holders over the oiled surface.
- Preheat the tray and then pour the batter mix into the mold areas. Het will help the batter to become crisp on the edges. It will help the batter to retain its Shape as the Letter -“J”.
- You can pour the wafer mixer into the molds for a similar purpose. If you have a wafer maker then place oil paper in it to keep the batter in shape.
- This is not a very perfect technique yet it will do the task. Handmade biscuits and wafers have their special significance no matter how organized they look. So give it a try and share your experience.
What you wanna read next- Let me know in the comments and also suggest any question or topic for our next discussion.